Spirulina Growing Kits vs DIY Spirulina Setup
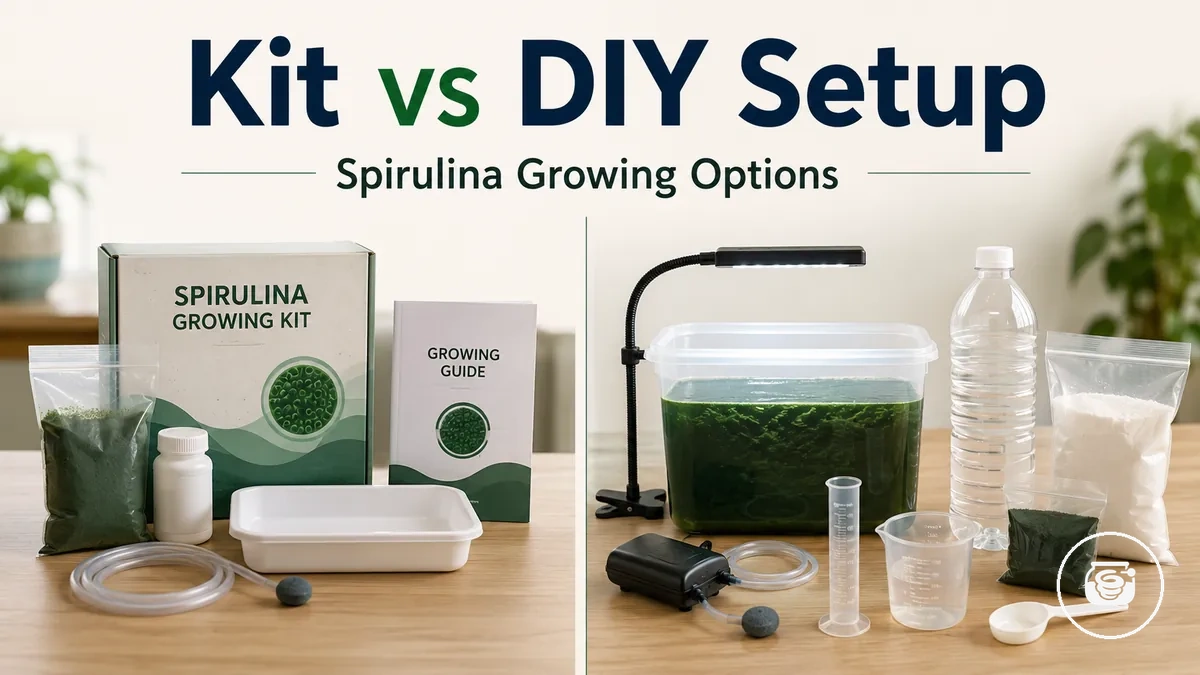
Spirulina growing kits favour bundled convenience, while a DIY spirulina setup favours component-level control. A packaged kit can reduce sourcing decisions by grouping selected supplies and instructions, whereas the DIY route requires the user to identify, obtain, and match separate components. User fit therefore depends on whether the priority is reduced preparation or greater control over setup cost, equipment, and supply choices.
Spirulina growing kits favour bundled convenience, while a DIY spirulina setup favours component-level control.
A beginner with no existing equipment may prefer a packaged kit because one bundle can reduce the number of separate purchasing and compatibility decisions. A cost-sensitive user who already owns a suitable algae growing container, monitoring tools, or reusable equipment may prefer a DIY spirulina setup. The comparison concerns decision responsibility and risk exposure rather than cultivation instructions or promised growth outcomes.
This distinction affects the learning curve, setup effort, contamination risk, and control of growth conditions.
A packaged kit is a coordinated supply route that may include a starter culture, grow medium, nutrient salts, pH testing materials, and instructions, although the exact contents must be verified for each bundle. A DIY spirulina setup uses separately sourced supplies, so the user accepts responsibility for matching the culture, medium, container, and monitoring tools. This distinction affects the learning curve, setup effort, contamination risk, and control of growth conditions.
A DIY spirulina setup uses separately sourced supplies, so the user accepts responsibility for matching the culture, medium, container, and monitoring tools.
The following comparison of spirulina growing kits versus a DIY spirulina setup shows how each route allocates supplies, monitoring responsibility, and decision risk.
| Option | What it usually provides | What the user must manage | Main tradeoff |
|---|---|---|---|
| Packaged kit | A selected bundle that may combine starter culture, grow medium or nutrient salts, instructions, and basic pH testing supplies | Confirm the included components, follow the supplied process, maintain cleanliness, and monitor growth conditions | Fewer sourcing decisions in exchange for less control over individual component selection |
| DIY spirulina setup | Separate control over the culture container, starter culture, medium, nutrient inputs, and monitoring tools | Source compatible supplies, verify each component, establish the setup, and monitor conditions independently | Greater configuration control in exchange for more research, preparation, and responsibility |
Table of Contents
Packaged Kits and DIY Setups Compared by Scope
Packaged kits and DIY setups differ in scope because a packaged kit groups selected supplies and instructions into one route, while a DIY setup leaves sourcing responsibility, compatibility checks, and setup control with the user. The main distinction is therefore who decides what is included and who carries responsibility for completeness and quality control.
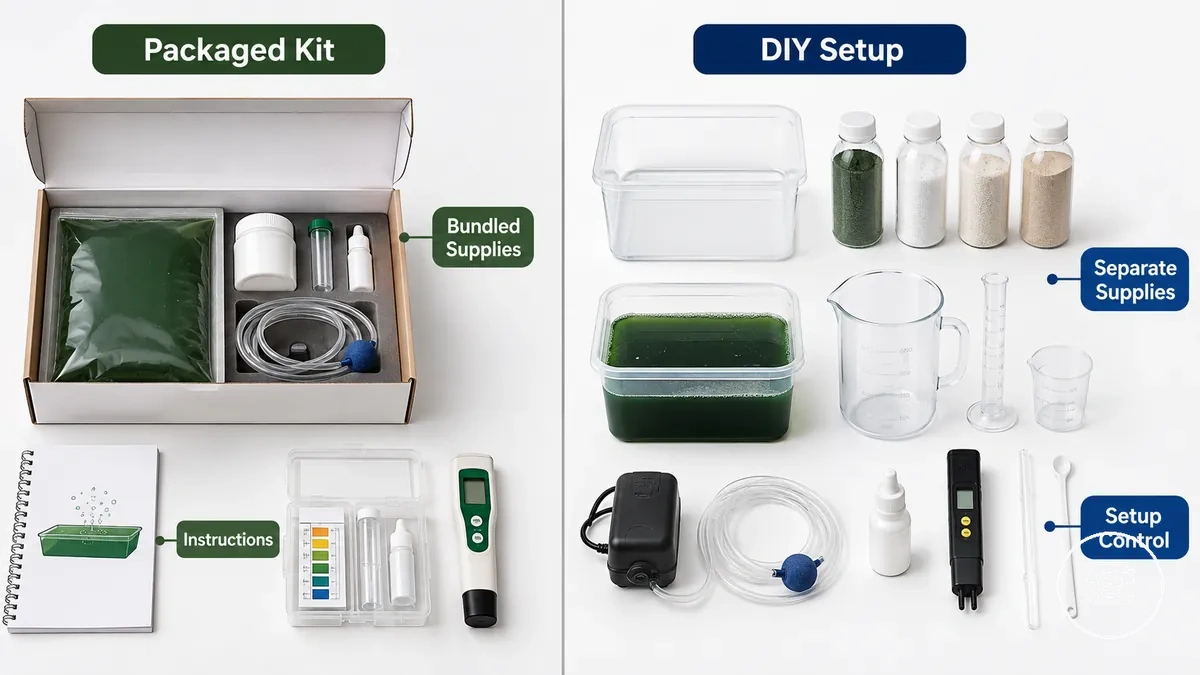
For a user starting without suitable supplies, a packaged kit can reduce sourcing decisions by combining bundled supplies with a defined instruction sequence. Completeness remains conditional because one kit bundle may include culture and medium but omit monitoring equipment, while another may include a broader set of setup materials. The user must verify the stated contents and instructions for the specific packaged kit rather than assume that the bundle covers every requirement.
This section compares setup routes rather than individual product models; the broader distinctions between kit types form a separate comparison.
A DIY setup gives the user direct control over separate components, suppliers, and equipment choices, but it also transfers component matching and quality control to the user. This section compares setup routes rather than individual product models; the broader distinctions between kit types form a separate comparison. The table keeps packaged kits and DIY setups compared by scope, showing what each route includes or leaves to the user and how that changes user responsibility.
| Option | Included or sourced | User responsibility | Best-fit signal |
|---|---|---|---|
| Packaged kit | Selected supplies and instructions are grouped in one bundle; omitted items remain separate purchases | Verify bundle completeness, assess instruction clarity, and manage any supplies or equipment not included | Fits users who want a defined starting route with fewer independent sourcing decisions |
| DIY setup | Culture, medium, container, and monitoring components are sourced separately | Match components, assess supplier information, and control the complete setup configuration | Fits users who want component-level control and accept greater verification responsibility |
What Kits Bundle Versus What DIY Must Source Separately
Spirulina growing kits usually reduce DIY sourcing by grouping core cultivation supplies into a kit bundle, while a DIY spirulina setup requires the user to source and match those components separately. Kit contents are not standardised, so the exact combination of supplies differs between manufacturers. The comparison below shows what kits bundle versus what DIY must source separately by supply category, compatibility condition, and likely setup effect.
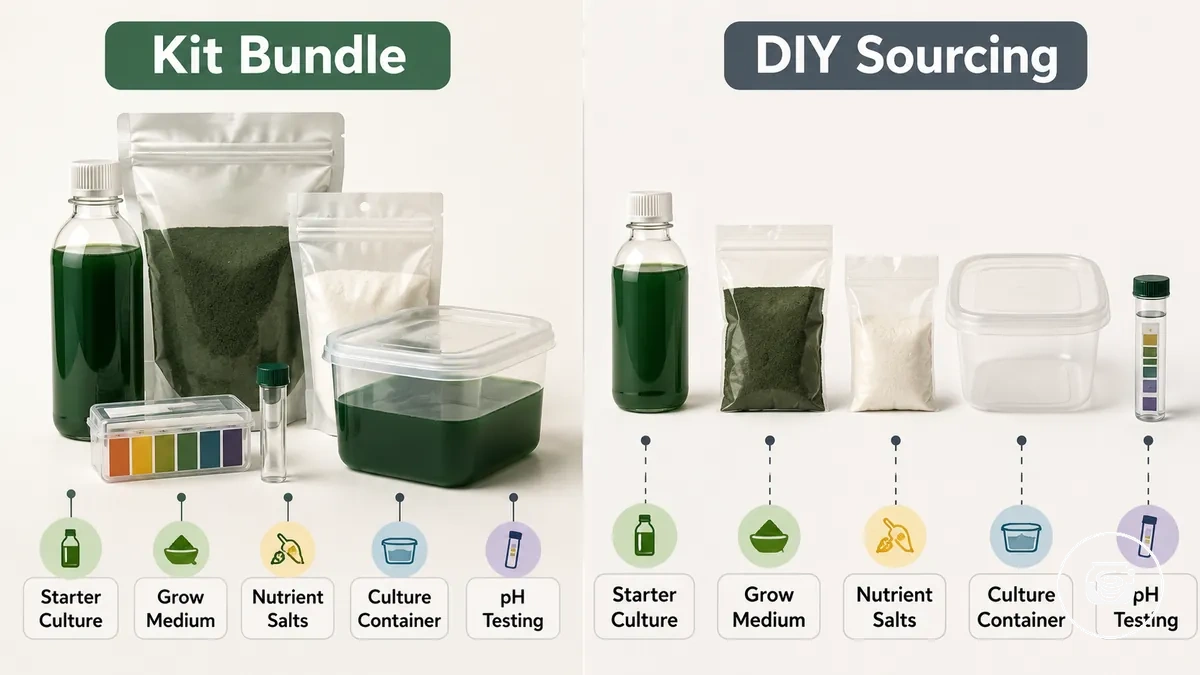
A kit bundle is a packaged collection of cultivation supplies intended to reduce sourcing decisions, whereas DIY sourcing requires each component to be selected individually. Most spirulina growing kits commonly include a starter culture together with some combination of grow medium, nutrient salts, instructions, or basic monitoring items, although the supplied components vary by kit. A culture container, pH testing equipment, and monitoring tools may be included or may require separate purchase, so checking the bundle contents before buying helps avoid missing components and compatibility problems.
A kit bundle is a packaged collection of cultivation supplies intended to reduce sourcing decisions, whereas DIY sourcing requires each component to be selected individually.
The table organises what kits bundle versus what DIY must source separately so each supply category can be compared by sourcing route and compatibility or setup effect rather than by individual products or brands.
| Supply item | Kit route | DIY route | Compatibility or risk effect |
|---|---|---|---|
| Starter culture | Usually included in the kit bundle | Purchased separately from a culture supplier | A healthy, compatible culture supports culture stability, while poor-quality or contaminated cultures increase failure risk. |
| Grow medium | Often supplied as a prepared grow medium mix | Mixed or purchased separately | The medium must match the nutritional needs of the starter culture to support stable growth. |
| Nutrient salts | May be pre-measured or supplied separately within the kit | Selected and measured by the user | Incorrect nutrient selection or measurement increases preparation effort and can reduce culture reliability. |
| Culture container | May be included depending on the kit | Chosen separately by the user | Container size, material, and suitability influence setup control and routine maintenance. |
| pH testing | Basic pH test kit may be included | Purchased separately | Without regular condition checks, pH changes are harder to identify before affecting the culture. |
| Monitoring tools | Some kits include basic monitoring accessories | Selected individually | Missing monitoring tools increase the effort needed to track growing conditions and maintain supply compatibility. |
If a packaged kit does not include one of these supply categories, the user must source the missing item separately, increasing setup effort and compatibility checks. Conversely, a DIY setup can achieve the same functional supply coverage when compatible components are selected together, but each additional sourcing decision increases the responsibility for matching components correctly.
Starter Culture, Grow Medium, Nutrient Salts, and pH Testing
Starter culture, grow medium, nutrient salts, and pH testing are the main biological and chemical input categories within the bundled-versus-DIY supply comparison. Their input condition determines whether the selected components are suitable to use together, so compatible inputs reduce setup burden, while missing or mismatched inputs increase uncertainty and can reduce culture stability without guaranteeing a specific cultivation outcome.

The image below identifies the key biological and chemical inputs so they can be compared by input condition, compatibility, and their effect on culture stability rather than as individual products.
- Starter culture: The starter culture supplies the live spirulina culture. A viable culture from a reliable source is the biological foundation of the setup, while poor source condition or contamination increases uncertainty during establishment.
- Grow medium: The grow medium provides the chemical environment that supports the starter culture. A medium formulated for spirulina is more likely to maintain culture stability than a mismatched medium with incompatible composition.
- Nutrient salts: Nutrient salts supply the minerals used to prepare the culture medium. Incorrect salt selection or concentration increases input-matching effort and raises the likelihood that the medium will not support stable growth.
- pH testing: pH testing monitors the condition of the grow medium rather than changing it directly. According to Bluelab, pH test strips provide an approximate indication of pH, while calibrated digital pH meters provide higher measurement precision for routine monitoring.
For example, a DIY setup that combines a viable starter culture with an incompatible grow medium or incorrectly prepared nutrient salts requires additional verification before cultivation begins. Likewise, relying only on approximate pH testing strips instead of a calibrated pH meter may increase measurement uncertainty, which can make it more difficult to identify changes in input condition before they affect culture stability.
Container, Aeration, Light, and Basic Monitoring Equipment
Container, aeration, light, and basic monitoring equipment are the physical equipment variables within the bundled-versus-DIY supply comparison. Their verified suitability determines how easily the culture can be observed, monitored, and adjusted, so appropriate equipment can improve visibility, stability, and user control, although both routes still depend on suitable growing conditions rather than equipment alone.
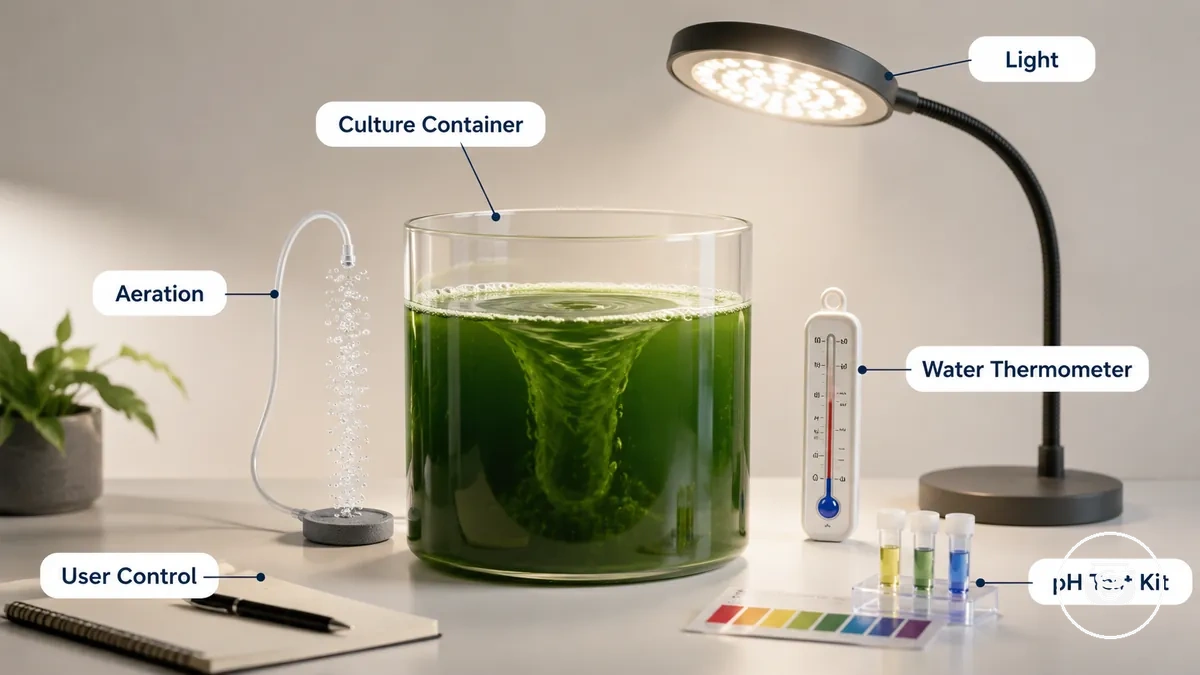
Container, aeration, light, and basic monitoring equipment should be checked as physical setup variables because the checklist below verifies how each equipment category influences visibility, stability, and user control without becoming part of the cultivation procedure.
- Culture container: Verify that the culture container provides clear visibility, appropriate volume for the intended setup, and unobstructed observation. Better visibility makes routine inspection easier but still requires regular monitoring.
- Aeration: Verify that aeration produces gentle, consistent culture movement rather than stagnant areas. Suitable circulation helps maintain even distribution within the culture vessel, while unsuitable movement increases verification work and reduces user control.
- Light: Verify that the light source provides even exposure across the culture container. Light suitability depends on the selected equipment and still requires ongoing monitoring rather than assuming stable performance.
- Water thermometer: Verify that a water thermometer is available to monitor temperature changes. A thermometer improves user control by providing measured readings instead of visual estimation.
- pH test kit: Verify that a pH test kit is available for routine checks. According to Bluelab, calibrated digital pH meters provide greater measurement precision than pH test strips, while strips provide an approximate indication of pH for basic monitoring.
A DIY setup often requires additional verification because the culture container, aeration equipment, light, and monitoring equipment are selected independently instead of being supplied together. For broader environmental guidance beyond physical equipment, see conditions both setups need.
Setup Cost and Ongoing Supply Cost Differences
Setup cost and ongoing supply cost differ between spirulina growing kits and a DIY spirulina setup because total value is determined by bundled supplies, separate purchases, repeat supplies, and the amount of suitable equipment the user already owns. A packaged kit can reduce initial purchasing by combining selected cultivation supplies, while a DIY route requires those components to be sourced individually. No route provides fixed savings because cost exposure changes according to included supplies, replacement purchases, and wasted materials caused by incompatible component choices.
If unsuitable components must be replaced after setup, wasted materials increase total cost exposure and reduce the overall value tradeoff.
For a beginner who owns few supplies, setup cost is usually concentrated in the first purchase because both cultivation supplies and supporting equipment may be needed. A packaged kit can reduce upfront sourcing when it already includes a compatible starter culture, grow medium, or nutrient salts, whereas a DIY setup often requires each category to be purchased separately. If unsuitable components must be replaced after setup, wasted materials increase total cost exposure and reduce the overall value tradeoff.
In this situation, the value tradeoff depends more on replacement supplies than on purchasing another complete setup.
For a user who already owns a suitable culture container and basic monitoring equipment, ongoing supply cost is driven mainly by repeat supplies rather than hardware. Replacement purchases commonly include starter culture when required, fresh grow medium, and nutrient salts, while existing equipment can continue to be reused if it remains suitable for cultivation. In this situation, the value tradeoff depends more on replacement supplies than on purchasing another complete setup.
It organises the main cost drivers that influence total value for both bundled kits and DIY setups.
The table below compares setup cost and ongoing supply cost differences by cost category rather than by product or retailer. It organises the main cost drivers that influence total value for both bundled kits and DIY setups.
| Cost factor | Kit route | DIY route | Value effect |
|---|---|---|---|
| Setup cost | Selected supplies are bundled into one purchase | Core components are purchased separately | Fewer separate purchases can reduce initial cost exposure, depending on bundle contents |
| Ongoing supply cost | Repeat supplies are purchased as existing materials are used | Repeat supplies are sourced individually | Replacement grow medium, nutrient salts, and starter culture become the main recurring costs |
| Bundled supplies | Selected cultivation supplies may already be included | Each supply category is matched independently | Bundling can reduce purchasing complexity but does not guarantee lower total cost |
| Separate purchase | Usually limited to omitted equipment or supplies | Applies to most cultivation components | Additional purchases increase cost exposure when more compatible items are required |
| Wasted materials | Reduced when bundled supplies are compatible with one another | Can increase if incompatible supplies are selected | Replacing unsuitable materials reduces total value regardless of the setup route |
| Existing equipment | Already-owned equipment may duplicate bundled items | Existing compatible equipment can be reused | Reusing suitable equipment can improve the overall value of a DIY setup |
After comparing these cost factors, the next consideration is cost and effort, because the overall value also depends on the time needed to source, verify, and maintain compatible cultivation supplies.
Setup Time and Learning Curve Differences
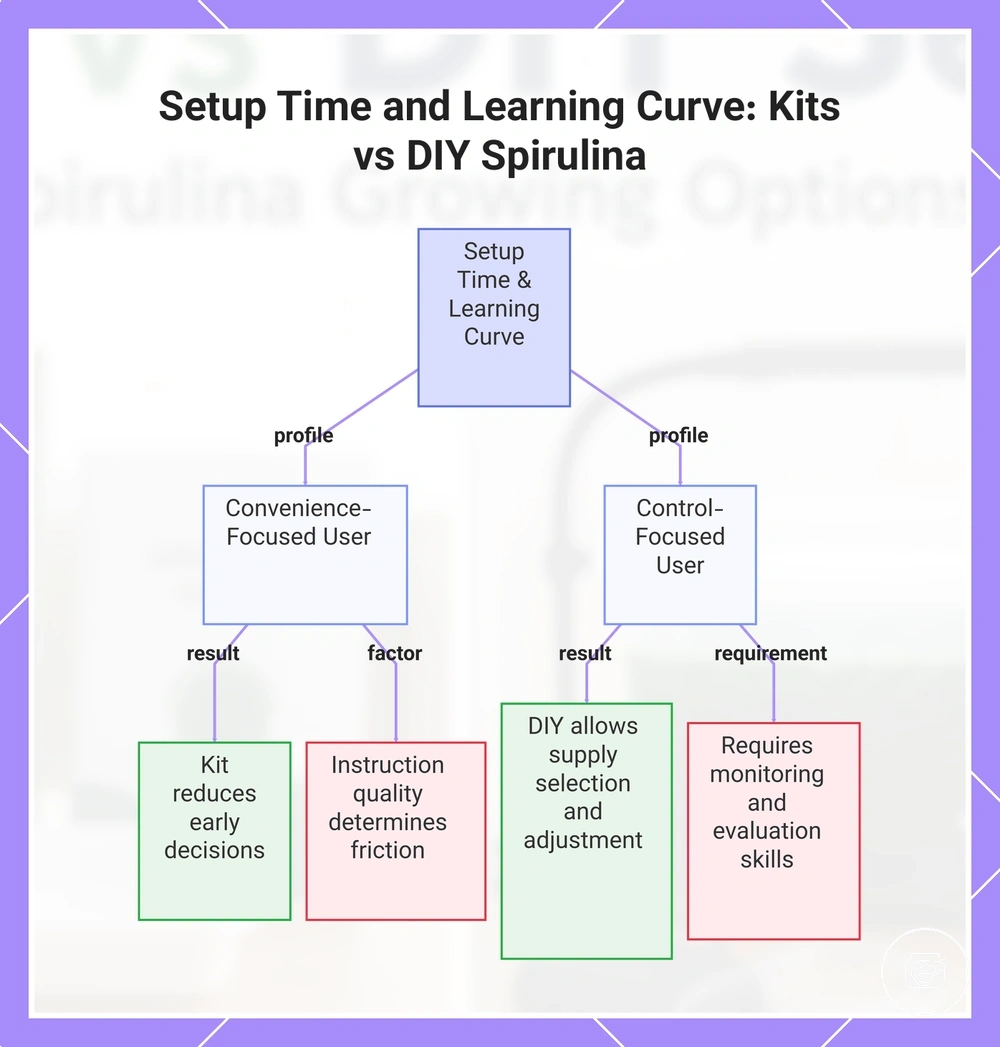
Spirulina growing kits usually reduce early setup time and user friction by limiting sourcing, measuring, adjusting, and preparation decisions, while a DIY spirulina setup creates a broader learning curve and more control over individual choices. The practical difference is not a fixed duration because instruction quality, prior experience, owned equipment, and monitoring confidence change the effort required for either route.
A kit therefore suits this user profile only when its instruction quality supports the user's experience level.
For a convenience-focused user, a kit route can improve preparation confidence when the instructions clearly identify included supplies, required measurements, adjustment points, and early monitoring responsibilities. Clear guidance reduces independent decisions and interpretation work, but incomplete instructions can preserve substantial user friction even when the supplies are bundled. A kit therefore suits this user profile only when its instruction quality supports the user's experience level.
A user already comfortable with monitoring and evaluating changes may value that control and experimentation more than reduced setup effort.
For a control-focused user, additional sourcing and measuring can be acceptable because DIY preparation allows individual supplies to be selected, compared, and adjusted. A user already comfortable with monitoring and evaluating changes may value that control and experimentation more than reduced setup effort. A user without that experience accepts a greater learning burden because supply matching and adjustment decisions remain their responsibility.
The following checklist organises setup time and learning curve differences as effort signals rather than setup steps.
The following checklist organises setup time and learning curve differences as effort signals rather than setup steps.
- Research time: A kit reduces research when its contents and instructions answer the main preparation questions; DIY sourcing requires the user to compare components and determine suitability independently.
- Supply matching: A coordinated kit limits compatibility decisions; a DIY route increases control but also increases responsibility for matching separately sourced supplies.
- Measuring: Pre-measured materials reduce preparation decisions; separately sourced materials require the user to confirm quantities and measurement methods.
- Adjusting: A defined kit process limits initial configuration choices; DIY preparation permits more adjustment but requires the user to evaluate each change.
- Instruction quality: Specific, complete guidance improves preparation confidence; vague or missing guidance increases interpretation work regardless of route.
- Early monitoring: Both routes require monitoring, while DIY users must also judge whether independently selected supplies and tools work together.
- User friction: Convenience-focused users generally benefit from fewer early decisions, while control-focused users may accept additional learning in exchange for experimentation and component choice.
This chart compares the setup time and learning curve differences between spirulina growing kits and DIY setups, focusing on user profiles and key effort signals.
How Each Route Handles Growth Conditions
Both spirulina growing kits and DIY spirulina setups depend on the same growth conditions, but they differ in how much support and verification they place on the user. A kit can reduce early condition-matching work when compatible supplies, monitoring tools, or clear instructions are included, while a DIY setup leaves water, light, temperature, pH, nutrients, and cleanliness to be matched independently. Neither route removes the need for ongoing condition checks.
Neither route removes the need for ongoing condition checks.
Growth conditions are the culture-environment categories that influence reliability and risk: water quality, light exposure, temperature control, pH condition, nutrient suitability, and cleanliness. These are the conditions both setups need; the purchasing route changes who verifies them, not whether they matter.
These are the conditions both setups need ; the purchasing route changes who verifies them, not whether they matter.
For a DIY user, each condition requires separate verification because the supplies, tools, and instructions may come from different sources. A kit can reduce that responsibility only when its included components and guidance cover the relevant condition; missing tools or incomplete instructions return the verification work to the user.
For a DIY user, each condition requires separate verification because the supplies, tools, and instructions may come from different sources.
The table below organises how each route handles growth conditions by linking each condition category to kit support, DIY responsibility, and its effect on reliability or risk.
| Growth condition | Kit support | DIY responsibility | Reliability or risk effect |
|---|---|---|---|
| Water | Support is present when the kit provides suitable guidance or compatible preparation supplies | Select and verify a suitable water source | Unverified water suitability increases uncertainty in the culture environment |
| Light | Support is present when instructions define the required lighting category or the kit includes a suitable source | Select the light source and verify that exposure remains appropriate for the setup | Mismatched or uneven exposure can reduce cultivation reliability |
| Temperature | Support is present when monitoring guidance or a suitable thermometer is included | Provide a monitoring method and check temperature changes | Unmonitored temperature changes increase condition-control risk |
| pH | Support is present when the kit includes testing materials and usable guidance | Select a suitable pH test method and interpret the readings | Without pH verification, condition changes are harder to detect |
| Nutrients | Support is present when the supplied nutrients are intended for the included starter culture and grow medium | Match the nutrient source and preparation method to the selected culture | A nutrient mismatch can reduce culture stability and increase adjustment work |
| Cleanliness | Support is limited to any handling guidance or clean supplies included with the kit | Maintain clean equipment, containers, and handling practices | Poor cleanliness increases contamination risk for either route |
DIY Risks That Packaged Kits Reduce or Shift
Packaged kits can reduce selected DIY risks by coordinating supplies, measurements, and instructions, but they do not remove the need for careful cleanliness, monitoring, and culture handling. The practical risk tradeoff depends on sourcing quality, measurement accuracy, component compatibility, and whether the user applies the supplied guidance correctly.
A mismatched medium can reduce setup reliability, while inaccurate measurement can contribute to nutrient imbalance or unstable pH.
Separate sourcing increases decision risk because the starter culture, grow medium, nutrient inputs, testing tools, and instructions may come from unrelated sources. A mismatched medium can reduce setup reliability, while inaccurate measurement can contribute to nutrient imbalance or unstable pH. Packaged kits may reduce these errors when their components are intended to work together and their instructions define the required measurements, but missing supplies or unclear guidance shift the decision risk back to the user.
The matrix below organises DIY risks that packaged kits may reduce or shift rather than eliminate.
Cleanliness and culture handling create contamination exposure in both routes because containers, tools, and repeated contact can affect the culture. A packaged kit may reduce avoidable handling mistakes by supplying coordinated materials or clearer instructions, but the user must still keep equipment clean and handle the culture carefully. The matrix below organises DIY risks that packaged kits may reduce or shift rather than eliminate.
| Risk area | Why DIY can increase it | What a kit may reduce | What still needs care |
|---|---|---|---|
| Sourcing quality | Separate suppliers can provide components with different documentation, storage histories, or compatibility assumptions | A coordinated bundle can reduce the number of independent sourcing decisions | The user must still verify the stated contents, storage condition, and instructions |
| Mismatched medium | The user must match the starter culture, grow medium, and nutrient inputs independently | An included culture and medium may be selected for the same setup | Compatibility still depends on the supplied components and correct preparation |
| Measurement accuracy | Separately sourced materials can require the user to interpret quantities and measurement methods without coordinated guidance | Pre-measured supplies or specific instructions can reduce measurement decisions | The user must still measure, mix, and monitor according to the stated method |
| Unstable pH | Incorrect preparation or insufficient testing can make pH drift harder to identify | A kit may include a pH test method and related condition guidance | Regular testing and correct interpretation remain necessary |
| Container choice | The user must assess whether a separately chosen container supports visibility, cleanliness, and suitable culture handling | An included container can remove one equipment-selection decision | The container still requires appropriate use, inspection, and cleaning |
| Cleanliness and contamination exposure | More separately handled components create additional contact points and cleaning decisions | Coordinated supplies and handling guidance can reduce avoidable contact or confusion | Clean tools, clean containers, and careful culture handling remain necessary for both routes |
| User error | DIY users must coordinate sourcing, measuring, preparation, and monitoring without one unified process | Structured instructions can reduce omitted or misordered decisions | Instructions must still be understood and followed; a packaged format alone does not prevent mistakes |
Contamination, pH Drift, Nutrient Imbalance, and Culture Loss
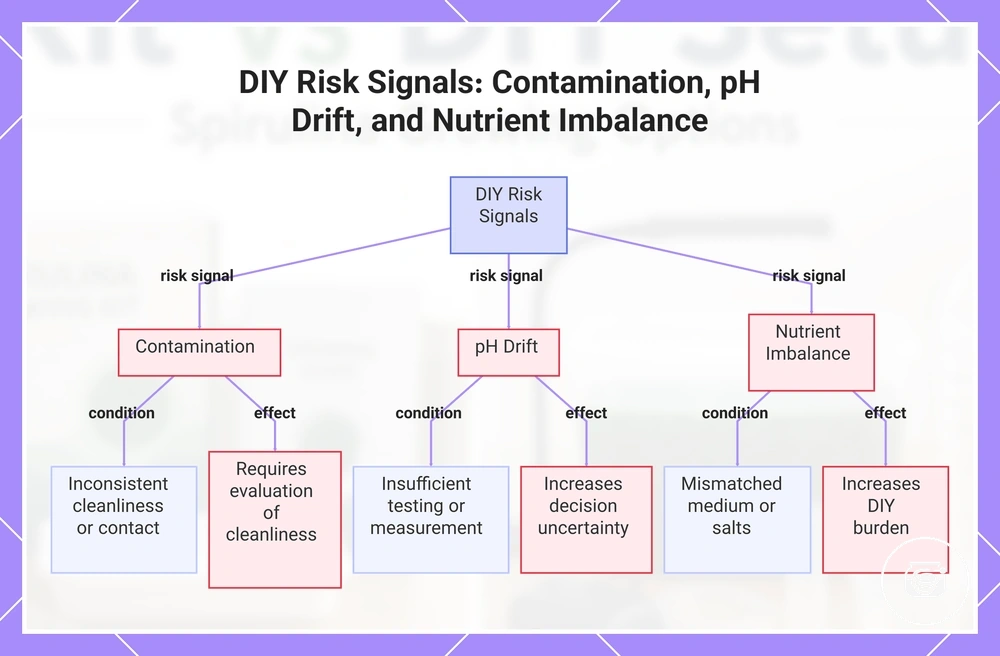
Contamination, pH drift, nutrient imbalance, and culture loss are possible DIY risk signals because separately sourced supplies, measurements, and handling decisions require independent verification. These issues do not reveal one exact cause, but their likely conditions show where additional responsibility can affect the setup decision.
Contamination, pH drift, nutrient imbalance, and culture loss are organised below as decision risks rather than repair steps.
Contamination, pH drift, nutrient imbalance, and culture loss are organised below as decision risks rather than repair steps.
- Contamination: The likely condition is inconsistent cleanliness or unnecessary contact during culture handling. This signal increases DIY risk because the user must evaluate the cleanliness of containers, tools, supplies, and handling practices.
- pH drift: The likely condition is insufficient testing, inaccurate measurement, or an unverified change in the culture environment. Unstable pH increases decision uncertainty because the user must recognise and interpret the change without assuming a single cause.
- Nutrient imbalance: The likely condition is a mismatched grow medium, unsuitable nutrient salts, or inaccurate preparation. This signal increases the DIY burden because independently sourced inputs must be compatible and measured consistently.
- Culture loss: The likely condition is one or more unresolved issues involving contamination, pH drift, nutrient imbalance, or culture handling. Culture loss affects the setup decision by increasing the possibility that time, culture material, and supplies will need to be replaced.
This chart shows the likely conditions and effects of three primary DIY risk signals—contamination, pH drift, and nutrient imbalance—that can lead to culture loss.
Which Option Fits Beginner, Budget, and Control-Focused Growers
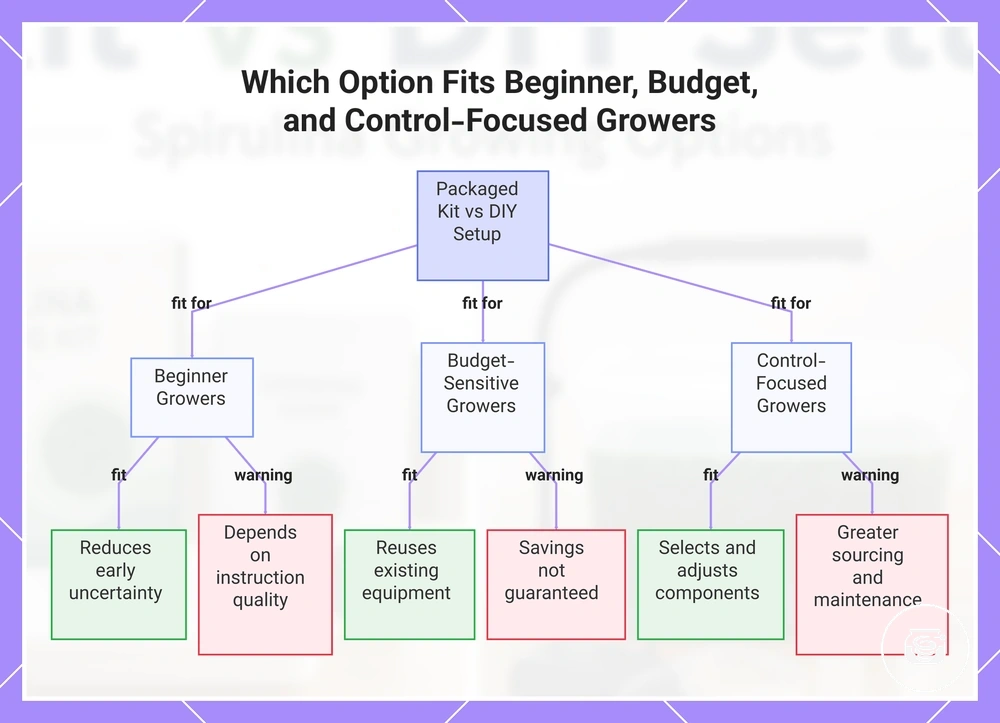
The better choice between a packaged kit and a DIY setup depends on experience, available supplies, budget sensitivity, control preference, risk tolerance, and maintenance commitment. A packaged kit generally fits users who value structured guidance and fewer early decisions, while a DIY setup generally fits users who already have suitable resources or want direct control over component selection. These selection criteria provide a qualified basis for comparing user fit without treating either route as universally preferable.
These selection criteria provide a qualified basis for comparing user fit without treating either route as universally preferable.
For beginner growers, a packaged kit may reduce early uncertainty when it includes coordinated supplies and instructions that clearly identify the user's responsibilities. This route reduces independent sourcing and compatibility decisions, which can improve preparation confidence for someone without previous cultivation experience. Beginner fit still depends on instruction quality because incomplete guidance can leave the user responsible for interpreting missing information and monitoring the culture independently.
The DIY route therefore fits this user profile when component-level purchasing control matters more than reducing sourcing effort.
For budget-sensitive users or growers with existing equipment, a DIY setup may be practical when suitable containers, monitoring tools, or other available supplies can be reused. Reuse can prevent duplicate equipment purchases, but it does not establish fixed savings because separate supplies must still be compatible and may require replacement. The DIY route therefore fits this user profile when component-level purchasing control matters more than reducing sourcing effort.
The checklist below organises beginner, budget, and control-focused fit by decision criteria rather than product rankings.
For control-focused growers, a DIY setup may provide the preferred level of control because the user selects, compares, and adjusts individual supplies and monitoring tools. This route also requires greater sourcing responsibility, risk tolerance, and maintenance commitment because compatibility and condition checks are not coordinated by one kit provider. The checklist below organises beginner, budget, and control-focused fit by decision criteria rather than product rankings.
- Beginner fit: A packaged kit may fit users who want structured instructions and fewer independent setup decisions.
- Budget sensitivity: A DIY setup may fit users who can reuse suitable equipment and avoid duplicating available supplies.
- Existing equipment: Users who already own compatible containers or monitoring tools may gain more practical value from separate sourcing.
- Control preference: A DIY setup may fit users who want to choose and adjust individual components rather than follow a predefined bundle.
- Risk tolerance: A packaged kit may fit users who prefer fewer sourcing and compatibility decisions, while DIY requires greater confidence in independent verification.
- Maintenance commitment: A DIY setup may fit users prepared to spend more attention on monitoring, adjustment, and component management.
The practical choice is a packaged kit when reduced uncertainty and coordinated guidance are the main priorities, or a DIY setup when existing supplies, direct control, and greater responsibility align with the user's situation. Users who select the packaged route can continue with choosing a kit by comparing included supplies, instruction quality, and suitability for their intended setup.
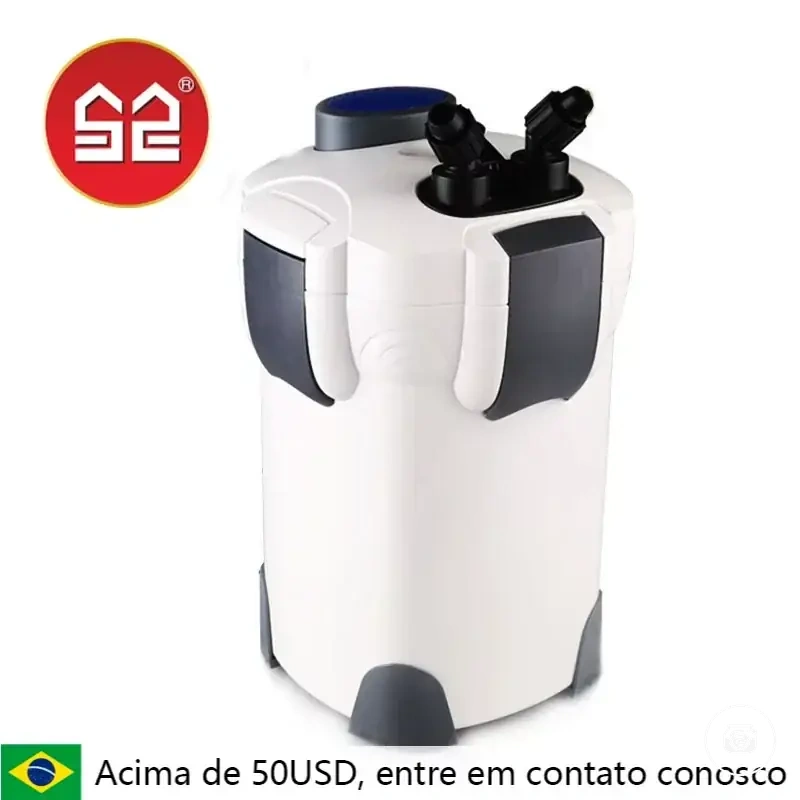
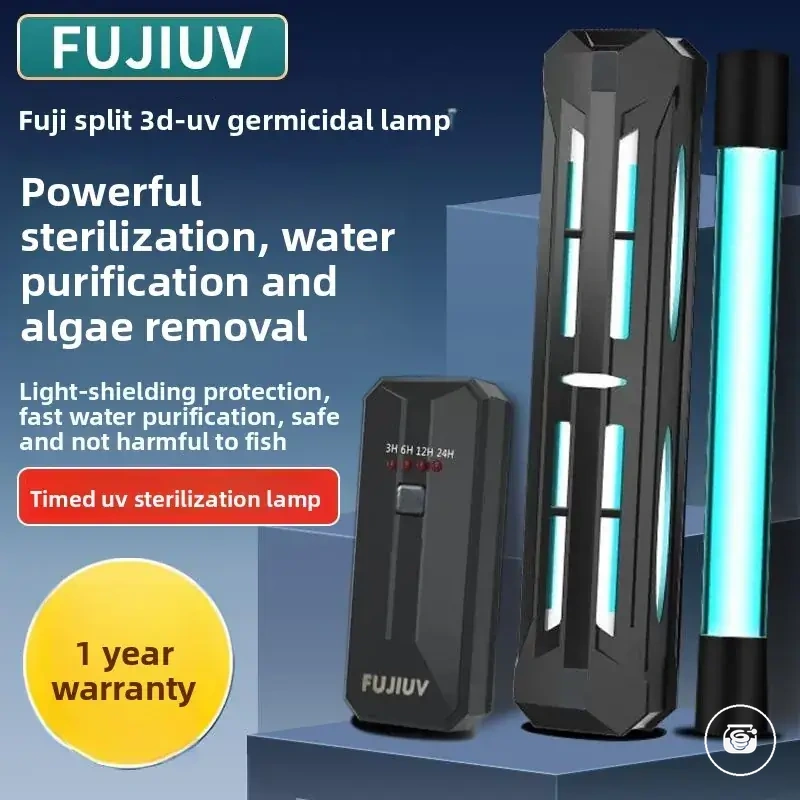
Here are product examples that may make comparison easier.
Here are product examples that may make comparison easier. Before buying, always review the compatibility criteria, essential features, and product details.
This chart shows how packaged kits and DIY setups fit different grower profiles based on experience, budget, and control preferences.